

Architectural Property Photography Best Practices
Table of Contents
- Why Architectural Property Photography Is a Different Discipline
- The Non-Negotiable Architectural Photography Gear List
- Architectural Photography Composition Tips for Perfect Verticals
- Mastering Interior Light: Ambient, Flambient, and Window Pulls
- How to Edit Architectural Photos Without Losing Authenticity
- Common Mistakes That Ruin Architectural Property Photography
- Client Communication and Legal Considerations for Property Shoots
- Conclusion: From Technical Skill to Visual Storytelling
- Frequently Asked Questions
Last Updated: September 9, 2026
Why Architectural Property Photography Is a Different Discipline
Architectural property photography is the specialized practice of capturing interior and exterior spaces with precise perspective control, accurate color, and intentional lighting design. It sits apart from general real estate photography because the goal shifts from documenting a space to conveying how volume, material, and light interact.
The discipline demands technical command over dynamic range, focal length choice, and post-processing. Below, we outline the technical standards that separate professional architectural property photography from amateur results.
The Non-Negotiable Architectural Photography Gear List
Architectural photography gear choices are driven by two competing demands: maximum dynamic range and absolute geometric precision.
Camera Body: Full-Frame Dynamic Range
A full-frame body is the baseline for the widest dynamic range and cleanest shadows when pulling detail from dark interiors (dpreview.com). The Sony Alpha 7R V (61MP, $3,899) and the Canon EOS R5 (45MP, $3,899) are the current standards; the Sony suits large-format printing, the Canon’s color science suits skin tones in lifestyle shots.
The Tilt-Shift Decision: Precision vs. Workflow Speed
A tilt-shift lens is the single most important investment for architectural work. The Canon TS-E 17mm f/4L ($2,149) and the Nikon PC 19mm f/4E ED ($2,299) are the two dominant options; the Canon offers a wider field of view, the Nikon a longer focus throw. Both require slow, deliberate work. The alternative is a standard wide-angle lens like the Sony 16-35mm f/2.8 GM ($2,299) with software perspective correction, which is faster but costs 10-15% of the frame in cropping.
Tripod and Head: The Stability Stack
The tripod is not a place to save money. The Manfrotto 055 Carbon Fiber ($450) is a solid mid-range choice, but the Really Right Stuff TVC-24L ($1,150) is what most high-volume professionals use for load capacity and vibration damping. The head matters more than the legs: a geared head like the Arca-Swiss C1 Cube ($1,800) allows independent micro-adjustment of pitch, yaw, and roll, while a ball head like the Really Right Stuff BH-40 ($400) is faster but makes fine vertical alignment slow.
Lighting: The Flambient Toolkit
The flambient technique requires at least two off-camera flash units. The Godox AD200 Pro ($329) is the workhorse: compact, battery-powered, and enough output to balance bright window light. The Godox AD400 Pro ($649) is the upgrade for large open-plan spaces or overpowering direct sunlight. Both work with the Godox X2T trigger ($69) for remote power control and high-speed sync.
Software: The Post-Production Stack
Adobe Lightroom Classic ($9.99/month as part of the Photography Plan) is the starting point for cataloging and basic corrections. Capture One Pro ($299/year) is preferred for stable tethering and precise color grading. Adobe Photoshop ($20.99/month standalone) is non-negotiable for advanced compositing and window pulls. AI-assisted editing like Imagen AI ($0.05 per image) learns your style and applies consistent corrections across large batches.
The Gear Gap: What Most Lists Miss
Most gear guides ignore the practical items that prevent failed shoots: a hot-shoe bubble level ($25), neutral density filters for balancing interior and exterior exposure ($150 for a 77mm set), and a laptop with a calibrated display for on-site review. Tethered shooting is a quality-control mechanism: reviewing a 61MP file at 100% zoom reveals focus issues and dust spots invisible on the camera’s rear LCD.
A common mistake is assuming that a tilt-shift lens eliminates the need for a tripod. It does not. The tilt-shift mechanism introduces mechanical play, and any camera movement during a long exposure at f/8 or f/11 will soften the image. The tripod and head are not optional accessories; they are the foundation of geometric accuracy.
The Budget Alternative: What to Skip and What to Keep
If budget is a constraint, invest in this order: tripod and head first, then a tilt-shift lens, then a full-frame body. A used Canon 5D Mark IV ($1,800) with a used Canon TS-E 17mm ($1,500) outperforms a new Sony A7R V with a standard zoom for architectural work, because geometric accuracy comes from the lens and tripod, not the sensor.
Architectural Photography Composition Tips for Perfect Verticals
The first rule of architectural composition is that vertical lines must remain vertical. Correct this in-camera by keeping the sensor plane parallel to the building facade, or use a tilt-shift lens to adjust perspective without tilting the camera body.
Position the camera at the midpoint of the room, roughly four to five feet, to avoid distortion. Frame leading lines such as hallways, staircases, or window mullions to draw attention toward the architectural focal point.
Focal length directly affects spatial perception: a 24mm lens captures a natural field of view, while 16mm exaggerates depth and makes rooms feel larger. Avoid placing critical vertical elements near the frame boundary where barrel distortion bends them.
Skipping a bubble level or relying on the camera’s internal leveling indicator is a common mistake. Even a two-degree tilt produces visible parallax issues that require significant cropping in post-production, reducing resolution and forcing awkward recomposition.
Mastering Interior Light: Ambient, Flambient, and Window Pulls
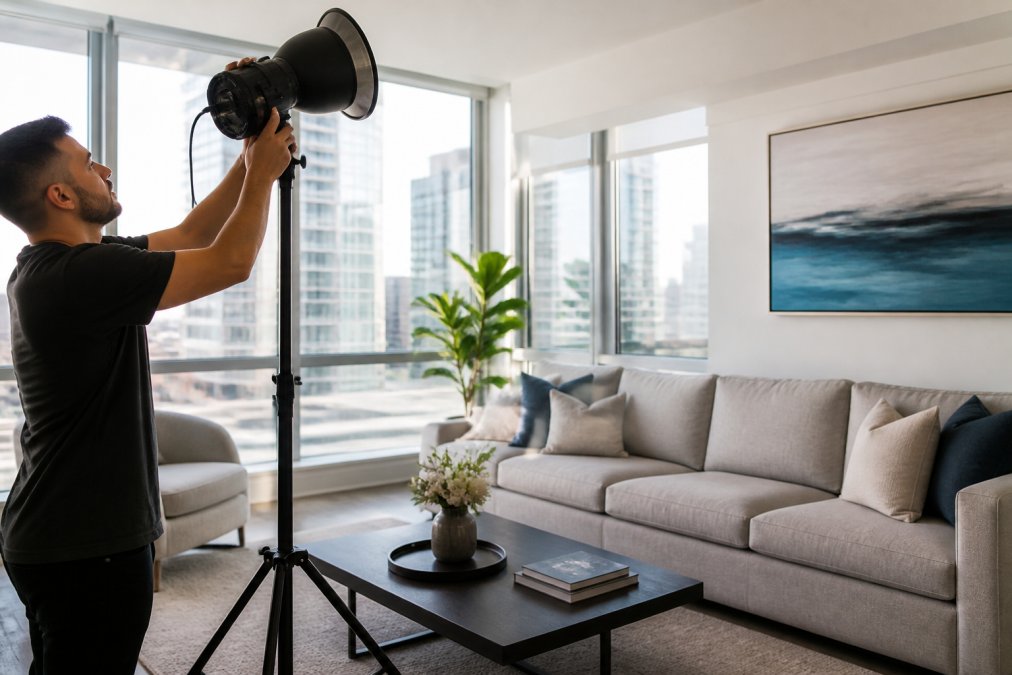
Interior lighting is a balancing act between window light and artificial light. The three core techniques, ambient-only, flambient, and window pulls, each solve a different problem, depending on the scene’s dynamic range and the client’s expectations.
Ambient-Only: When Natural Light Is Enough
The ambient-only approach uses natural light alone, working when the dynamic range between the brightest window and darkest interior corner is within the sensor’s capability (around 14 stops on a modern full-frame body). In practice, this means overcast days, north-facing rooms, or interiors with small windows.
For ambient-only shots, expose for the highlights (windows) and lift shadows in post. Set ISO 100 and f/8 for depth of field; a typical overcast exposure might be 1/15 second at f/8, requiring a tripod. Lifting shadows by more than two stops risks noise and color banding.
Flambient: The Workhorse Technique
The flambient technique combines an ambient frame with one or more flash-lit frames, capturing natural light and interior detail separately for blending in post (fstoppers.com). Used for 80% of professional interior shots, it gives control over both the window view and interior shadows.
The Shooting Sequence:
- Ambient frame: Lock the camera on the tripod. Set the exposure so the windows are properly exposed, not blown out. This typically means metering off the brightest area of the sky visible through the window. The interior will be dark, sometimes by three to four stops.
- Flash frames: Without moving the camera, introduce the flash units. Position the first flash to bounce off the ceiling or a wall to create a broad, soft fill. Position a second flash to fill shadow areas behind furniture or in corners. Take a test shot and adjust the flash power until the interior exposure matches the ambient exposure level.
- Blend in post: In Photoshop, stack the ambient frame as the base layer and the flash frame on top (adobe.com). Use a layer mask to paint in the flash exposure only where the interior needs detail, leaving the windows from the ambient frame untouched.
The key parameter is flash power. A common starting point is 1/4 power on a Godox AD200 Pro bounced off a white ceiling in a 12×12-foot room; for larger spaces, increase to 1/2 power or add a second unit. Set the flash to manual mode, not TTL, because TTL varies output between frames, making blending impossible.
When shooting flambient frames, keep the camera locked on the tripod and use a remote trigger. Any movement between the ambient and flash frames creates ghosting artifacts that are extremely difficult to correct during exposure blending.
Window Pulls: The Post-Production Composite
Window pulls are a post-production technique for when the exterior view is important but the dynamic range is too extreme for a single exposure, such as bright midday sun where the sky is three to four stops brighter than the interior.
The process requires two exposures from the same tripod position: one for the interior (e.g., 1/4 second at f/8) and one for the exterior view through the window (e.g., 1/500 second at f/8).
In Photoshop, the workflow is:
- Place the interior exposure as the base layer.
- Place the window exposure on top.
- Add a layer mask to the window exposure layer.
- Paint black over the mask to reveal the interior exposure, leaving the window area white so the exterior exposure shows through.
- Feather the mask edge by 2-5 pixels to avoid a hard line where the window frame meets the glass.
The critical detail is that the window frame must come from the interior exposure, not the window exposure, so its color and texture match the interior lighting. Painting the mask carefully around the frame is the difference between a seamless composite and an obvious cut-and-paste.
The Decision Framework: Which Technique When?
| Scene Condition | Recommended Technique | Why |
|---|---|---|
| Overcast day, small windows | Ambient-only | Dynamic range is within sensor limits |
| Sunny day, large windows, interior detail critical | Flambient | Flash fills shadows while ambient preserves window view |
| Sunny day, exterior view is a selling point | Window pull | Guarantees a clean sky and proper exterior exposure |
| Mixed lighting (tungsten + daylight) | Flambient with color correction | Flash can be gelled to match window light, reducing color cast |
The AI-Assisted Cleanup Workflow
After the blend comes cleanup: construction debris, scuff marks, and reflections in glass require retouching. Adobe Photoshop’s Generative Fill (2024 and later) removes such distractions in seconds. Do the exposure blend first, then run Generative Fill, then manually review for AI artifacts. This cuts post-production on a typical 20-image shoot from four hours to two and a half.
How to Edit Architectural Photos Without Losing Authenticity
The goal of editing architectural photos is to correct technical flaws and balance exposure, not to fabricate a space. Perspective correction comes first: use the Transform panel in Lightroom Classic or the Keystone tool in Capture One Pro to straighten verticals before touching color or exposure.
Mixed lighting sources, such as warm tungsten alongside cool daylight, create unnatural color casts. Balance these by adjusting white balance per light source using masking tools, then grade toward a neutral or slightly warm tone that matches how the space feels in person.
Exposure blending merges multiple bracketed frames to capture full dynamic range. Process each frame individually, then blend manually or use luminosity masks to preserve highlight detail in windows while retaining shadow detail in interior corners.
AI-assisted tools like Imagen AI create personalized profiles that learn your editing style and apply consistent corrections across large batches, starting at roughly $0.05 per photo. This automation preserves consistency while cutting post-production time dramatically.
Common Mistakes That Ruin Architectural Property Photography
The most frequent error in architectural property photography is neglecting property staging. Cluttered countertops, visible cables, and personal items distract from the architecture and force time-consuming retouching. Walk the space with the client before the session and agree on what gets cleared, moved, or styled.
A second common failure is shooting at the wrong time of day. Midday sun creates harsh shadows and blown-out highlights, while the golden hour produces warm, directional light that flatters facades. For interiors, the blue hour balances interior lights with remaining ambient sky light.
Handheld shooting at small apertures produces camera shake and soft images. Combined with high ISO to compensate, the result is noise and lost detail that no amount of sharpening can recover.
Client Communication and Legal Considerations for Property Shoots
Clear client communication prevents scope creep and re-shoots. Before the session, confirm the shot list, intended use, and delivery format. A written brief covering key selling points, required angles, and emphasized architectural details keeps the shoot aligned with commercial goals.
Establish usage rights in writing before the shoot: confirm whether the client receives a license for listing use only or full commercial rights for advertising campaigns. Interior shots of furnished properties may include artwork, and reproducing copyrighted pieces in commercial imagery without permission creates liability.
Exterior shoots depend on sky conditions, so monitor forecasts and schedule flexibility for overcast days, which provide soft, even light ideal for facades. Have a backup plan for interiors that does not rely on the exterior view if conditions turn unfavorable.
Conclusion: From Technical Skill to Visual Storytelling
Mastering architectural property photography requires equal parts technical precision and artistic judgment. The gear, composition rules, and lighting techniques covered here form the foundation, but the real differentiator is translating a physical space into a narrative that resonates with buyers, investors, and brand audiences.
That translation demands experience across disciplines, from perspective control to post-production workflow. At BLACKWATER Promotions, our team combines specialized photography expertise with a collaborative project approach, delivering customized visual content.
Get started with BLACKWATER Promotions and let us capture your next property with the precision it deserves.
Frequently Asked Questions
What equipment is essential for professional architectural property photography?
A full-frame camera with a wide-angle lens (17-24mm) is the starting point. A sturdy tripod, like the Manfrotto 055 Carbon Fiber, is non-negotiable for sharp, level shots. For perspective control, a tilt-shift lens such as the Canon TS-E 17mm f/4L is ideal, though software can correct distortion in post. A portable flash like the Godox AD200 Pro is key for balancing interior and window light. This architectural photography gear list focuses on stability and control over camera body features.
How does architectural property photography differ from standard real estate photography?
Standard real estate photography documents a space for a listing, aiming for clean, bright, and wide shots that show the layout. Architectural property photography is more deliberate. It emphasizes design, geometry, materials, and the interplay of light and shadow. It requires a deeper understanding of composition, perspective correction, and visual storytelling to capture the architect’s intent, not just the square footage. The goal is to create images that work for high-end marketing, publications, and brand campaigns.
What are the best practices for lighting interior architectural spaces?
The most reliable method is the flambient technique. First, take an ambient-only shot with the camera on a tripod to capture the natural window light. Then, without moving the camera, take additional shots with a portable flash to light the interior. You blend these exposures in post-processing to get a well-lit interior with natural-looking outdoor views. This approach controls dynamic range and avoids the flat look of HDR, preserving the mood of the space.
How do you handle perspective distortion in architectural images?
The goal is to keep vertical lines straight. In-camera, you can use a tilt-shift lens, which shifts the lens element to correct perspective without tilting the camera. If using a standard wide-angle lens, you must keep the camera sensor perfectly level, both horizontally and vertically. Any remaining convergence can be fixed in post-processing using the Transform or Upright tools in Adobe Lightroom Classic or the Keystone tool in Capture One Pro.
How do you edit architectural photos to look natural?
Start with a proper white balance to ensure neutral tones. Use perspective correction to fix any vertical line convergence. For exposure blending, combine your ambient and flash frames manually or with layer masks. Finally, make global adjustments to contrast and color to match the feel of the space, but avoid over-saturating colors or over-darkening windows, which can make the image look unrealistic.