


7 Tips for Consistent Corporate Team Photography
Table of Contents
- Start With a Corporate Headshot Style Guide
- Lock Down One Lighting Setup for Every Session
- Choose a Neutral Background and Keep It Consistent
- Give Employees Professional Headshot Wardrobe Advice
- How to Make Corporate Headshots Look Natural
- Schedule Sessions in Batches and Standardize Post-Production
- Plan for Remote and Hybrid Team Members
- Conclusion: Consistency Comes From Process, Not Luck
- Frequently Asked Questions
Last Updated: September 21, 2026
Start With a Corporate Headshot Style Guide
A corporate headshot style guide defines the exact backdrop, lighting, framing, wardrobe, and editing rules for every employee photo. It is the single most useful tool for consistent corporate team photography because it removes guesswork. We build these guides with clients before any session gets booked.
What to Document Before Anyone Stands in Front of a Camera
Lock these decisions down in writing:
- Backdrop color and material (for example, a mid-gray seamless paper or a painted wall)
- Lighting pattern (one setup, used for every person)
- Camera height and crop (eye level, head-and-shoulders frame)
- Wardrobe rules (colors to wear, colors to avoid, patterns to skip)
- Retouching limits (what gets cleaned up, what stays)
- File naming and delivery format
Photograph one “anchor” employee first, then match every later session to that reference image. Comparing new shots against a real photo catches drift far faster than reading a spec sheet.
Lock Down One Lighting Setup for Every Session
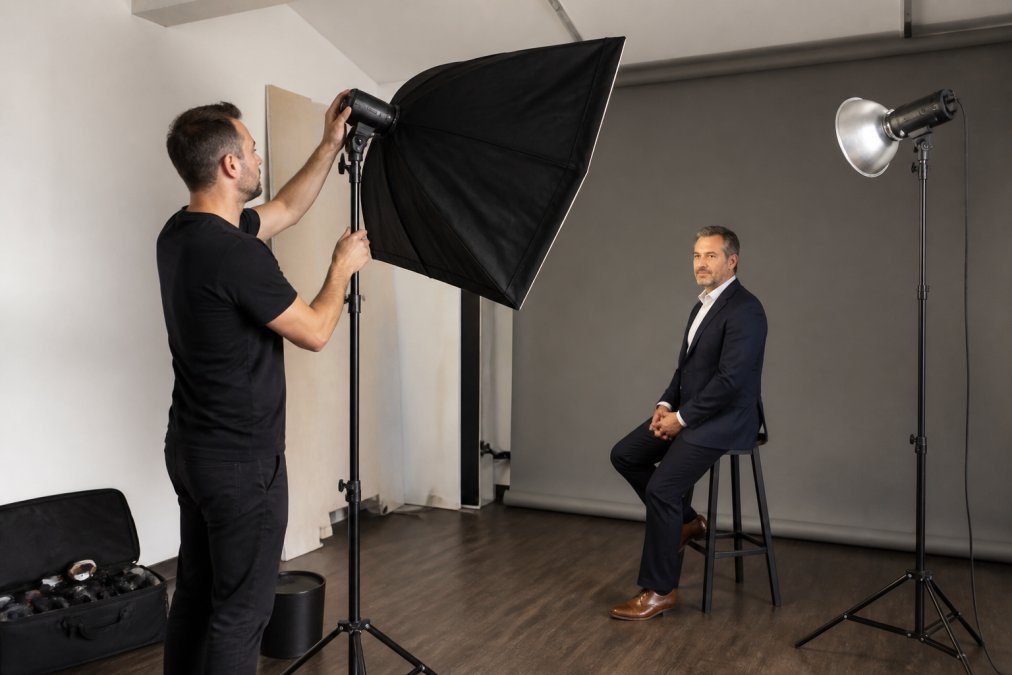
Lighting consistency is what makes a set of team photos feel like one set. Pick one setup and repeat it exactly, session after session.
Choose a Neutral Background and Keep It Consistent
A neutral background keeps attention on faces, not furniture. Mid-gray, light gray, and soft white are the safest picks. Avoid busy offices with visible clutter, glass walls with reflections, bright windows that blow out the frame, and colored walls that clash with your brand palette.
Switching backdrops between sessions is the number one cause of mismatched team pages. If you must change, reshoot everyone. A half-old, half-new grid looks worse than a fully outdated one.
Give Employees Professional Headshot Wardrobe Advice
Professional headshot wardrobe advice should be short, specific, and sent before the shoot day. Vague guidance like “business casual” produces wildly different results. Send a one-page brief: solid colors in mid to dark tones, long sleeves even in summer, no logos or loud patterns, minimal jewelry, and hair styled as they would for client meetings. Ask people to bring two options, and tell them the background color, a dark gray backdrop with a black shirt creates a floating head.
How to Make Corporate Headshots Look Natural
The fastest way to make corporate headshots look natural is to stop saying “smile” and give people something to do. Stiff expressions come from waiting; natural ones come from movement. Have the subject turn away and turn back on a count, think about a recent win, or talk while you shoot, and count down from three so they know when the frame fires.
Posing Prompts That Work for Shy or Camera-Shy Employees
Camera-shy employees need a different approach: start with a conversation, not a camera.
The best posing guide is a good conversation. Technique matters, but comfort shows up in the eyes.
Schedule Sessions in Batches and Standardize Post-Production
Batch scheduling and a fixed editing recipe keep a 50-person shoot looking like one shoot. Book people in 10-to-15-minute blocks, back to back, in one location, with a 5-minute buffer every hour so one overrun does not cascade. Then standardize the edit with a written spec: skin cleanup only (keep texture), no reshaping or slimming, fixed white balance across the set, and one color grading profile applied to every image.
Build the Recipe Once, Then Enforce It
A written spec is not enough, the recipe has to live in the editing software so it applies the same way every time, whether one retoucher handles all 50 files or five split the batch.
Here is the workflow most experienced teams use:
- Shoot a color reference frame. Put a gray card or color checker in the first frame of every session so the editor has a known neutral to white-balance against.
- Edit one hero image by hand. Pick the strongest frame from the first session and dial in skin tones, contrast, and color grade until it matches the anchor image from your style guide.
- Save that as a preset or develop profile. In Lightroom Classic, that is a develop preset; in Capture One, a style; in Adobe Camera Raw, a preset plus a camera profile. One click reproduces the look.
- Sync across the batch, then spot-check. Apply the preset to every file, then review at 100% zoom. Presets handle color and tone; they do not fix a stray hair or a shiny forehead.
- Export with locked settings. Fix the output resolution, color space (sRGB for web, Adobe RGB only if print is the destination), and sharpening amount. Different export settings are a silent consistency killer.
Keep a single “master” edited file for each employee. When a new hire joins, open the master, apply the same preset, and compare side by side before exporting. Drift is easier to catch against a real reference than against memory.
What Breaks Consistency in Post
The most common failure points, in order of how often they show up:
- Mixed white balance. A window-lit frame next to a strobe-lit frame will not match even after a preset, because the color of the light itself is different. Fix it at the shoot, not in the edit.
- Different retouchers, different taste. Two editors interpret “natural skin” differently. Give them the same reference image and preset, and require a side-by-side check before delivery.
- Over-retouching one person. Heavy smoothing on one employee while everyone else keeps texture makes the set look broken. Cap the retouch at the same level for everyone.
- Inconsistent crop. A head-and-shoulders frame next to a tighter headshot reads as two different shoots. Lock the crop ratio and head position in the frame.
File Naming Conventions and Digital Asset Management for Teams
File naming conventions and a shared asset library prevent the slow decay that hits every growing company, six months after a shoot, nobody remembers which file is approved. Use a simple, sortable format:
lastname-firstname-department-2026.jpg
A few practical rules that keep the library usable:
- One approved file per person. Do not keep three “final” versions. Pick one and archive the rest.
- Tag by department, role, and year. When a team page needs updating, you can pull everyone from one department without opening folders.
- Store the preset alongside the files. If a new hire is photographed in two years, the editor needs the exact recipe, not a description of it.
- Keep raw files. Storage is cheap; a reshoot is not. Raw files let you re-edit to a new look later without rebooking anyone.
Consistency in post is a system, not a skill. One reference frame, one preset, one export setting, one approved file per person.
Plan for Remote and Hybrid Team Members
Remote and hybrid employees are the hardest part of team photography, and most guides ignore them. You cannot fly everyone to one studio, so you need a plan that keeps remote shots matching the in-person ones. The goal is not identical gear, it is identical light shape, background tone, and crop, so the eye reads the set as one shoot.
Your options, from most control to least:
- Ship a portable kit and direct the shoot over video. A collapsible backdrop, two small LED panels or speedlights with diffusers, and a tripod-mounted phone or laptop for the video call. The employee sets it up with your guidance; you frame and trigger remotely.
- Send a local photographer a spec sheet. Give them your lighting diagram, backdrop color, crop rules, and a reference image. Pay for a short test frame before the session so you can approve the look.
- Use a guided remote setup with a pro on the call. A photographer joins a video call, directs the employee’s position and expression, and the employee fires the shutter on a count. Slower per person, but it works for executives who cannot travel.
What Goes in the Portable Kit
A kit that produces matching results is smaller than most people expect:
- Collapsible backdrop. A pop-up frame with a reversible gray/white cover. Gray matches most studio setups; white is a fallback if the room is small.
- Two lights with diffusion. Small LED panels or speedlights with softboxes. The key is diffusion, not power, bare bulbs create hard shadows that will not match a studio softbox.
- A gray card or color checker. One frame with this in the shot lets the editor white-balance the remote session to the same neutral as the studio session.
- A tripod or stand. Handheld remote shots drift in height and angle, which breaks the crop match.
- A printed one-page setup diagram. Pictures beat paragraphs when someone is setting up alone in a spare bedroom.
Matching Remote Light to Studio Light
The biggest reason remote headshots look different is light direction. A studio softbox at 45 degrees produces a specific shadow pattern under the nose and beside the jaw; a window on one side of a home office produces a different one.
To match:
- Replicate the key light angle. If the studio key is at 45 degrees camera-left, the remote key goes at 45 degrees camera-left. A window can serve as the key if it is on the correct side and diffused with a sheer curtain.
- Control the fill. A white foam board or a second small light on the opposite side keeps shadows from going too dark.
- Kill overhead lights. Ceiling fixtures cast color and shadow that no preset can fully correct. Turn them off and rely on the kit.
- Shoot a test frame before the employee’s session. Have them send one image; adjust position and exposure; then run the real shoot.
Do not let remote employees use a webcam or phone front camera for the final shot. The lens distortion and low resolution will not hold up next to a studio frame. A phone rear camera on a tripod is the minimum.
Accessibility and Inclusivity in Remote and In-Studio Shoots
This is where a consistent look and a respectful shoot overlap. Give employees advance notice of lighting and flash, offer a seated option, and let people request a preferred side of the face. Small accommodations cost nothing and improve the final set.
A few specifics that matter:
- Flash sensitivity. Some employees are sensitive to strobe flash. LED continuous light is a workable substitute and matches well if the diffusion and angle are the same.
- Mobility and seating. A stool or chair at the correct height keeps the camera at eye level without requiring anyone to stand. Document the seat height in the style guide so remote setups match.
- Cultural and religious attire. Head coverings, modesty requirements, and religious jewelry should be accommodated without comment. The wardrobe brief should say what to avoid (logos, loud patterns) and explicitly permit religious and cultural items.
- Hair and skin tone. Retouching presets tuned on one skin tone can flatten another. Test the preset on a range of skin tones before applying it to a full batch, and keep texture rather than smoothing it away.
Handing Off Remote Files
Remote shoots create a file-handoff problem studio shoots do not: the employee, local photographer, or kit operator all end up with files in different places.
Standardize the handoff:
- One upload destination. A shared drive folder or a DAM intake folder, named by employee and date.
- Raw plus one edited reference. The editor needs the raw file to apply the preset, and a reference frame to confirm the look.
- The gray-card frame. Always included, always first in the folder.
- A short note. Which kit was used, which light angle, and any deviation from the spec. Future sessions can then match the deviation or correct it.
Remote consistency is a logistics problem, not a photography problem. Same light angle, same background tone, same crop, same handoff, the gear matters less than the spec.
Conclusion: Consistency Comes From Process, Not Luck
Getting a full team to look like one team is a process problem, not a talent problem. Write the style guide, lock the lighting, standardize the edit, and name the files, then every new hire slots into the same visual brand identity.
Engage Us!
Frequently Asked Questions
What is the 20-60-20 rule in photography?
The 20-60-20 rule is a composition guideline: 20% of the frame is the foreground subject, 60% is the main subject or focal point, and 20% is background or negative space. For corporate team photography, this helps keep every headshot balanced and visually consistent. If you apply the same framing ratio across all employees, the resulting images feel like a cohesive set rather than a random collection of individual portraits.
How do you ensure consistency across multiple corporate headshots?
Consistency comes from standardizing four variables: lighting, background, camera settings, and post-production. Use the same lighting setup, neutral backdrop, lens, and distance for every person. Then apply one color balance and retouching standard across the full set. A written corporate headshot style guide that documents these choices lets any photographer reproduce the same look for new hires or remote team members.
What colors should employees avoid for headshots?
Avoid bright neons, busy patterns, and large logos that pull attention from the face. Solid mid-tone colors like navy, gray, burgundy, and forest green photograph well against neutral backdrops. White can blow out under studio lighting, and pure black can lose detail in shadows. A professional headshot wardrobe advice list shared before the session prevents most color and pattern problems before they happen.
What lighting setup is best for professional team photography?
A two-light setup with a large softbox as the key light and a fill light or reflector on the opposite side works for most corporate headshots. Keep the key light at a 45-degree angle and slightly above eye level. Use the same distance and power settings for every person. For teams, consistency matters more than complexity. A simple, repeatable lighting setup beats an elaborate one that changes between sessions.