

How to Make Corporate Headshots Look Natural
Table of Contents
- Why Most Corporate Headshots Look Unnatural
- How to Prepare for a Professional Headshot Session
- Corporate Headshot Outfit Ideas That Work on Camera
- Lighting Techniques for Natural-Looking Corporate Headshots
- Best Poses for Corporate Headshots That Feel Relaxed
- Camera Settings, Focal Length, and Background Selection
- Managing Facial Expressions and Eye Contact
- Pre-Session Self-Assessment Checklist
- Frequently Asked Questions
Last Updated: September 2, 2026
Why Most Corporate Headshots Look Unnatural
Corporate headshots fail for one consistent reason: people show up stiff, with forced smiles and wide eyes. The camera catches all of it.
Corporate headshots are professional portraits for LinkedIn profiles, company websites, sales materials, and media kits. When they work, they communicate confidence and approachability. When they don’t, they make executives look uncomfortable in front of a camera.
At BLACKWATER Promotions, we’ve worked with corporate teams. The pattern is always the same: the technical setup is fine. What derails the session is everything the subject brings into the room before the shutter clicks.
The good news is that naturalness in a corporate portrait is learnable. This guide covers grooming, wardrobe, camera settings, and the psychological work that happens before you step in front of a lens.
How to Prepare for a Professional Headshot Session
Preparation is where most of the work happens. A well-prepared subject photographs naturally.
Grooming and Skin Texture
Skin texture reads differently on camera than in person. Subtle shine, redness, or uneven tone becomes more visible under studio lighting.
Practical grooming steps for the day before and morning of your session:
- Skin: Moisturize the night before to reduce dry patches. On the day, use a light mattifying product to control shine.
- Hair: Get a trim at least a week before the shoot, not the day before.
- Facial hair: If you have a beard, groom it two days prior. Day-of stubble can look unkempt at certain focal lengths.
- Nails: Clean, trimmed nails matter more than most people expect.
- Eyes: Avoid alcohol the night before. Puffy or red eyes are difficult to correct in post-production.
Mental Prep and Psychological Comfort
Most people are self-conscious in front of a camera. That self-consciousness creates micro-tension in the face, particularly around the jaw, eyes, and forehead. The camera reads that tension as stiffness.
Techniques that genuinely help:
- Practice your expression the night before. Stand in front of a mirror and find the version of your smile that feels effortless. Photograph it with your phone and review it.
- Arrive early. Give yourself 20 minutes to settle before the session starts.
- Talk to the photographer before you pose. A brief conversation resets your mental state from “being evaluated” to “collaborating.”
- Use the squinch. Slightly squint the lower eyelids rather than opening eyes wide. It reads as confident and relaxed.
- Breathe before each frame. A slow exhale just before the shutter fires relaxes the face and shoulders.
The single most effective psychological comfort technique is reframing the session as a conversation rather than an audition. Ask the photographer a question right before each pose. The slight mental shift away from “how do I look” produces a more natural expression almost every time.
Corporate Headshot Outfit Ideas That Work on Camera
Wardrobe is a visual communication tool. What you wear signals your industry, seniority, and approachability before anyone reads your name.
Colors and Neutral Tones That Photograph Well
Neutral tones are the standard for corporate headshots because they don’t compete with your face. A clean color palette keeps the viewer’s attention on your expression and eyes.
Colors that consistently photograph well:
- Navy blue: Projects authority without aggression. Works across most skin tones and backgrounds.
- Charcoal gray: Reads as professional and serious.
- Deep burgundy or forest green: Adds personality without distracting.
- White and off-white: Clean and bright, but requires careful background selection.
- Muted earth tones: Warm and approachable. Effective for healthcare, education, or nonprofit sectors.
The key principle is contrast. Your outfit should contrast enough with your background to create clear separation.
What to Avoid in Your Wardrobe Selection
- Busy patterns: Thin stripes and small checks create a moiré effect on camera.
- Bright neon colors: They throw color casts onto skin, affecting white balance.
- Logos and text: Dated quickly and can look unprofessional.
- Overly casual clothing: Dress one level above your day-to-day.
- Clothes that don’t fit well: Ill-fitting clothing reads as careless or uncomfortable.
Avoid wearing a brand new outfit to your headshot session. Unfamiliar clothing creates subtle physical self-consciousness that shows in your posture and expression.
Lighting Techniques for Natural-Looking Corporate Headshots
Lighting is the single most consequential technical decision in a headshot. Get it wrong and even a perfectly posed, well-dressed subject looks flat or harsh.

Natural Light vs. Diffused Studio Light
Both approaches can produce excellent corporate headshots.
Natural light works best with large north-facing windows or shaded outdoor locations. Golden hour light, the hour after sunrise or before sunset, produces warm, flattering tones with dimension (peer-reviewed research). The limitation is consistency: natural light changes minute to minute, making it harder to maintain a uniform look across a large group.
Diffused studio light is the standard for corporate portrait work because it’s controllable and repeatable. A two-light setup, a key light at roughly 45 degrees to the subject and a fill light opposite, produces even, flattering illumination while maintaining facial definition.
For groups of more than five people, diffused studio light is the practical choice. It allows consistent image quality across every subject.
Key lighting principles for natural results:
- Avoid direct overhead lighting, which creates unflattering shadows under the eyes and nose.
- Use a reflector or fill light to soften shadows on the opposite side of the face.
- Keep the light source large relative to the subject. Larger light sources produce softer, more diffused light.
- Match your white balance to the light source to avoid color casts.
Best Poses for Corporate Headshots That Feel Relaxed
The biggest posing mistake is asking people to “just stand there.” Standing directly square to the camera is the least flattering angle for almost everyone.
Shoulder Alignment and Head Tilt
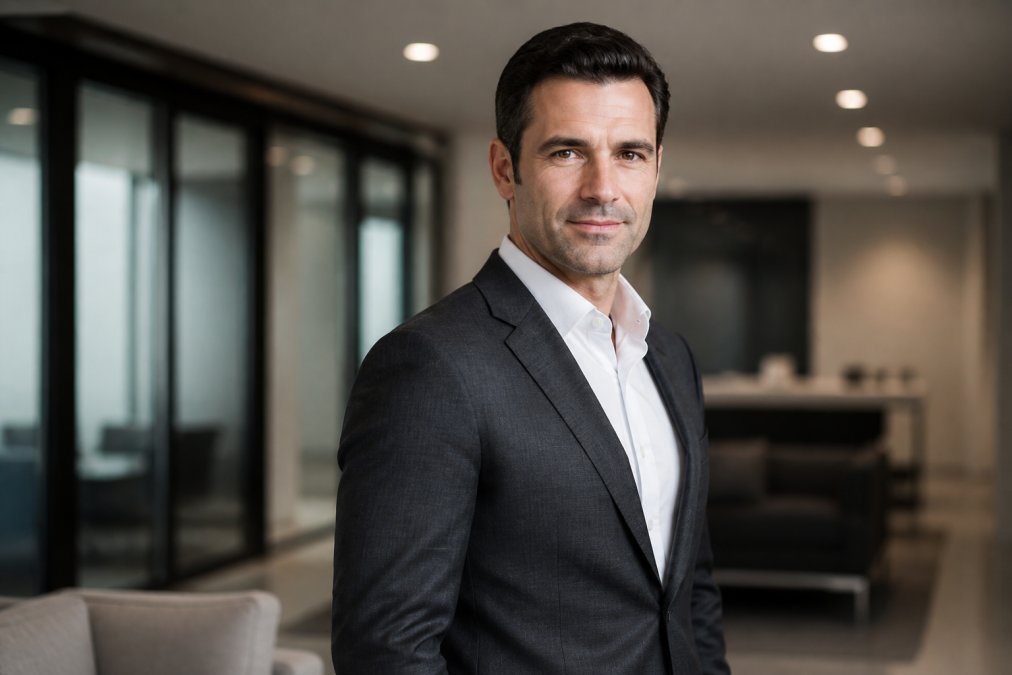
The most natural and universally flattering pose follows a simple principle: angle the body, face the camera.
Step-by-step breakdown:
- Turn the body 30-45 degrees away from the camera.
- Shift weight to the back foot. This relaxes the posture naturally.
- Bring the near shoulder slightly forward. This creates a dynamic composition.
- Align the jaw forward and slightly down. This defines the jawline without looking forced.
- Apply a slight head tilt. A 5-10 degree tilt toward the camera reads as approachable and engaged.
- Keep hands relaxed. If hands are visible, they should be loose, not clenched.
Body Language by Industry
The right posture and expression for a financial services executive communicates something entirely different from what works for a creative director or healthcare professional.
| Industry | Recommended Posture | Expression | Wardrobe Signal |
|---|---|---|---|
| Finance / Legal | Upright, squared shoulders | Composed, measured smile | Dark suit, minimal accessories |
| Technology / Startups | Relaxed, slight lean | Open, approachable | Business casual, clean lines |
| Healthcare | Open posture, forward-facing | Warm, reassuring | Scrubs or professional attire |
| Creative / Marketing | Dynamic angle, expressive | Confident, energetic | Color, personal style |
| Real Estate | Approachable stance, open | Friendly, accessible | Business professional, warm tones |
| Executive Leadership | Authoritative, composed | Confident, direct | Formal business attire |
The goal is the same in every case: the viewer should infer your professional context from the portrait alone.
Camera Settings, Focal Length, and Background Selection
Technical settings matter more than most subjects realize. The wrong focal length distorts facial features. The wrong aperture puts your subject in a background that competes for attention.
Focal length is the most important technical variable. An 85mm to 135mm lens on a full-frame camera is the standard for portrait work (peer-reviewed research). These focal lengths compress perspective in a flattering way and produce natural-looking facial proportions. Wide-angle lenses distort features and make noses appear larger.
Aperture and depth of field work together to separate the subject from the background. A wide aperture, f/1.8 to f/2.8, produces soft bokeh behind the subject (peer-reviewed research). For group headshots, f/4 to f/5.6 gives more depth of field while maintaining background separation.
ISO and shutter speed are secondary in controlled environments. Keep ISO as low as lighting allows to minimize grain, and use a shutter speed fast enough to eliminate motion blur, typically 1/125th of a second or faster.
Background selection is a strategic decision. Options include:
- Solid neutral backgrounds (white, gray, charcoal): Clean, versatile, and consistent across a group.
- Environmental backgrounds (office, lobby, branded space): Adds context and personality.
- Outdoor backgrounds: Natural and approachable, but subject to lighting variability.
For most corporate headshot sessions, an 85mm lens at f/2.8, with a clean neutral background and diffused studio lighting, produces the most consistent, professional results across a diverse group of subjects.
Managing Facial Expressions and Eye Contact
Expression is the hardest element to direct and the most important one to get right.
Eye contact is the anchor of any corporate portrait. The subject’s gaze should connect directly with the lens. A common mistake is looking at the photographer’s face rather than the camera, which creates an off-axis gaze that reads as distracted.
A practical technique: place a small piece of tape or a sticker directly on the lens barrel. Give subjects something specific to look at.
Authentic expressions come from genuine mental states, not physical instructions. More effective direction includes:
- “Think about a recent project you’re proud of.” This produces a natural, engaged expression.
- “Tell me what you do in one sentence, then hold that thought.” The slight cognitive engagement relaxes the face.
- “Look away from the camera, then look back on my count.” The transition moment often produces the most natural expression.
Micro-expressions are worth understanding. The face makes involuntary expressions in fractions of a second before and after a conscious expression settles. Experienced portrait photographers shoot in bursts and select frames from within that window. Request burst shooting and review multiple frames from each pose.
Pre-Session Self-Assessment Checklist
Run through this checklist the morning of your corporate headshot session.
The Night Before:
- Outfit selected, pressed, and confirmed to fit well
- Grooming completed (beard trimmed, hair washed)
- Skincare routine completed, moisturizer applied
- Practiced expression in mirror, photographed with phone, reviewed
- Confirmed session time, location, and parking
- Avoided alcohol to prevent puffiness
Morning of Session:
- Light mattifying product applied to control shine
- Hair styled as planned (not freshly cut)
- Outfit does not have logos, busy patterns, or neon colors
- Arrived 15-20 minutes early to settle before shooting
- Spoken briefly with the photographer about goals and intended use
- Phone on silent and put away before session starts
During the Session:
- Body angled 30-45 degrees from camera
- Weight shifted to back foot, near shoulder slightly forward
- Jaw angled forward and slightly down
- Eyes focused directly on the lens, not the photographer’s face
- Breathing slowly before each frame
- Requesting burst shooting for expression selection
Accessibility and Inclusivity Considerations:
Corporate headshot sessions should work for every subject. Communicate the session format in advance so subjects know what to expect. Offer seated options for subjects who need them, provide adequate time rather than rushing through a large group, and ensure lighting and background choices work across a full range of skin tones.
Inclusive headshot sessions also mean avoiding a one-size-fits-all posing script. Some subjects will feel more natural in a slightly different position. The goal is a portrait that represents the individual accurately.
Good corporate headshots require more than a camera and a clean background. The technical side can be learned and replicated. The harder challenge is creating conditions where a real person, who may be nervous or unfamiliar with being photographed, looks genuinely themselves.
BLACKWATER Promotions specializes in corporate photography that solves exactly this problem. Our collaborative approach means we work with your team before, during, and after the session to ensure every subject has what they need to photograph naturally and consistently. Whether you need portraits for a single executive or a team, we handle the full production process with the same attention to detail.
Get started with BLACKWATER Promotions and walk away with corporate headshots that actually represent who you are. Let’s Talk.
Frequently Asked Questions
Q: How do I relax my facial expression for a professional headshot?
A: The most effective technique is to take a full breath, exhale slowly, and then open your eyes just before the shot. This resets muscle tension around the eyes and jaw. Some photographers also use the ‘squinch’, a slight narrowing of the lower eyelids, to project confidence without looking strained. Briefly looking away from the lens and then back just before the shutter fires also helps your expression read as natural rather than posed.
Q: What colors should I avoid wearing for a corporate headshot?
A: Avoid pure white, which can blow out in highlights and flatten your skin tone. Neon or very saturated colors pull attention away from your face and distort white balance. Busy patterns, thin stripes, small checks, or loud prints, create a moiré effect on camera. Stick to solid mid-tones: navy, charcoal, muted burgundy, or soft gray. These neutral tones complement most skin tones and keep the viewer’s focus on your face, which is the whole point of a corporate portrait.
Q: What are the best poses for natural-looking corporate headshots?
A: Avoid squaring both shoulders directly at the camera, it reads as confrontational and adds visual width. Instead, angle one shoulder slightly toward the lens, keep your chin forward and slightly down to define the jawline, and tilt your head just a few degrees. For a dynamic pose, shift your weight to your back foot. These adjustments create depth and visual storytelling without making the image look staged. The goal is approachable professionalism, not a rigid ID photo.
Q: How does lighting affect how natural a corporate headshot looks?
A: Harsh direct light creates deep shadows and emphasizes skin texture in unflattering ways. Diffused light, either from a large softbox, a reflector, or soft natural light through a window, wraps evenly around the face and produces a more authentic, editorial quality. Shooting during golden hour outdoors gives warm, flattering tones. In a studio, positioning the main light at roughly a 45-degree angle to the subject’s face while using a fill source to soften shadows produces the clean, professional look most corporate headshots require.